PagesPat's Ponderings

Saturday, December 31, 2011

Even Nice Girls Have a Little Naughty in Them

Now that the holidays are over and the presents I received put in their places, I have a little time to play with the crafting toys that have found a home in my room.  I received a wax sealing kit, which I am still deciding if I should keep or not.  What can I do with it, looking with an eye toward my card making? 
  Meanwhile, I made this card today for those friends to whom I send New Year cards.  With December being so busy, I don't send a lot of Christmas cards, but I do send new year cards to them in January.  I used the Queen Kat Designs stamp called "Bodice".  Would you believe that I won this as a blog prize and it was one of my very first stamps from QKD?  And I couldn't imagine how I was going to use it!  Now I find myself using it time and again.
  Here, I have a little after-Christmas theme going on.  I can't remember where I heard the sentiment, but I knew it was the perfect sentiment to go with my Christmas present corset.  Inside, the card reads. "And what did you get for Christmas?"
  So, whether you have been nice or naughty, what did you get for the holidays??  If you are still looking for some good rubber, QKD has an end of year sale on stamps that ends, well, today!! No coupon needed, go get yours HERE before the sale expires!!

Friday, December 30, 2011

Another Year bites the Dust...

Wanda by Suzanne Urban
...and to celebrate the coming new year, I present to you Wanda, whose love of wine leads her to believe that pigs can, indeed, fly!  The Squigglefly digi image is from Suzanne Urban, and is one of my favorites.  I got the idea to use her when I received a Holiday card with coupon from Vera Bradley.  You know, once you go Vera, it's very hard to go back to any old purse! 
Anyway, the card they sent me had a beautiful pattern (as all Vera Bradley bags do) and I couldn't just throw it away now, could I?   So the pattern led me to New Year's wishes, and the theme led me to the image, and the rest is blogging history (at least in my little nanobyte on the net).
I wanted to go with minimal embellishments, so I added a gorgeous handmade flower, thanks to my crafting friend Shannon, and some faux pearls.  I colored the image with a combination of Copics and my new Spectrum Noir alcohol markers (I got a set of Reds and of Pinks for Christmas).  I added some shine with Stickles and Liquid Glass.
Squigglefly starts up a new round of challenges in January, and I have been blessed to have been "kept on" as a design team member.  Those designing with me are posted on the right, all talented crafters!  So stock up on your Squigglefly digi images (don't have any?  Freebies HERE) and get ready to challenge yourself for fun and prizes.

Tuesday, December 27, 2011

TIME for a New Year...

...and with a New Year comes new releases, new inspiration, new techniques to try, new cards to make--the list is endless!  Time to make your resolutions for a new crafting year.  Personally, I would like to make more time for myself, to craft, to create, to explore, to discover, to share.
Meanwhile, I do have a little time to get crafty with a new release from QKD.  It's a stamp from Jeanie Dickinson called Time Piece.
I thought it worked perfectly for my New Year's card.  Every year we get together for dinner and the evening with friends of ours--actually, I met my girlfriend in college, and our families have lived close by since. We've shared a lot of play dates with their son and my daughter.  Anyway, we usually start the evening off with a special dinner.  one year it was crab legs and lobster.  Another it was a turkey and a ham.  Another year we enjoyed finger foods and sweets all night long.
Back to my card, I used a leftover piece of patterned paper from My Mind's Eye Christmas Stack and used the stamp a couple times on the paper, as well as on white cardstock, which I then inked up, distressed and Stickled.  Some flowers and sequins embellish one clock, while a flourish hides behind another.  I used my jute lace on the bottom of the card, and let the little New Year's mouse scamper across it, on his way to climbing up the clock.
Simple, yet timely, don't you think?  And here's my resolution:
A happy New Year! Grant that I
May bring no tear to any eye
When this New Year in time shall end
Let it be said I've played the friend,
Have lived and loved and labored here,
And made of it a happy year.
~Edgar Guest  (from thequotegarden.com)

Saturday, December 24, 2011

Going Crazy, would like some company

This is the first Christmas that the stress is really getting to me.  Between family drama all because of a restraining order, working until today, free time shared with 4 year old granddaughter, feeling the loss of familiy members who have gone before me, presents unwrapped and only half the decorations up, and guests for Christmas dinner, I am trying to relax with Christmas music but the owrds are not making much sense (or making the wrong sense).  Has anyone heard of these songs, or is my mind rewiring the words?
 Do You Hear What I Hear?
 We Three Kings Disoriented Are
 I Think I'll be Home for Christmas
 Deck the Halls and Walls and House... and Lawn and Streets and Stores and Office and Town and Cars and Buses and Trucks and... Trees and.....
 Santa Claus is Coming to Town to Get Me
 Thoughts of Roasting on an Open Fire
 You Better Watch Out, I'm Gonna Cry, I'm Gonna Pout, Maybe I'll Tell You Why
 Silent night, Holy oooh look at the Froggy - can I have a chocolate, why is France so far away?
 Jingle Bells, Jingle Bells, Jingle Bells, Jingle Bells, Jingle Bells, Jingle Bells, Jingle Bells,...


Just kidding, got these disturbed titles off FB. 
Here's hoping everyone has a relaxing holiday, filled with love and laughter, fun and family. 
Merry Christmas to all, and to all a good night!!

Friday, December 23, 2011

Robin in Ivy

Chicago weather is confusing enough for us humans, but when it confuses the animals, you know it's bad.  We have geese flying north in November and south in February, squirrels looking for handouts at your front door when they should be snuggled somewhere in our bare trees, and skunks that go traipsing about our back yard when they should be sound asleep.

So this little robin decided to brave the Windy City winter, and is seen resting amongst the ivy.  To celebrate the 23rd day of my 24 Days of Crafting Christmas The new QKD stamp set from Joanna Bromley is aptly called Robin in Ivy, and I love coloring this little guy over and over.  Today I set him against a blue sky twinkling with snowflakes, and gave him more color than is normally seen in the winter.  That's because I remember a poem/song from my childhood called "little Robin Red-breast" and wanted him to match the song lyrics.

To celebrate the 23rd day of my 24 Days of Crafting Christmas, I made this card to give to my mom Christmas morning.  She's the only one who keeps my love of crafting in mind when buying Christmas presents!  I gave her my wish list from QKD's  shoppe
I plan to ring out the old year by bringing new stamps into my craft room, and keep on crafting!  Ho-ho-ho!

Thursday, December 22, 2011

Faux Bottle Cap Christmas Tree

I was at work this morning when a couple of Youth Group girls from the church I work at asked me for some craft ideas for a Christmas Party they were hosting at a Home for Seniors with Disabilities.  They had already planned the carols they were singing and an activity, but needed a craft or two that a nine or ten year old could handle (mental age of most of the residents).  Did I mention our youth group has garnered awards for their social justice and service programs?

Besides the Candy Cane Reindeer craft, I came up with ornaments made with these wonderful free digi's I got online.  They are circles with images and greetings inside, and two of them were Christmas themed.  I printed enough of them for each resident to color and glue onto paper doilies on which the girls had already attached ribbon hangers.  But when I was playing with the right size, I printed up a bunch of circles that were too small for their needs.

So being the miser that I am (although I prefer the terms "frugal" and "upcycler"), I thought what a great size to pop into bottle caps and make a Christmas tree.  Problem was, I hadn't been saving any bottle caps!  Then I thought, I don't necessarily need the bottle caps, let's see what they look like by themselves.

Hmm, pretty plain, if you ask me.  So I used some metallic glitter glue around each of the circle images and by golly, they look like bottle caps!  I dimensionally popped them onto my green cardstock tree frame, gave my tree a leg (or limb) to stand on and adhered it to this awesome patterned paper from Me & My Big Ideas paper stack.  I added some jute lace ribbon, which was recycled from packaging on a gift I received (thank you, Liz, for the chocolates and the ribbon).  Of course, every tree needs a star, but my brown rose with glittered leaves looks perfect perched on top.


Here's a close up of the two images I used.  I just wish I knew the designer so I could give credit where credit is due!  If you happen to know the artist who made or offered these, please speak up.  If I come across her work, I'll come back and ID the images.

Meanwhile, take a cocoa break and breathe deeply.  relax your shoulders, stretch your neck, and be in the moment, right now, and enjoy the sights and sounds of Christmas.

Merry Crafting!

Monday, December 19, 2011

Day 19 - Christmas Tree Ornament

With my Christmas cards all postal, my creativity turns to tags and packages and ornaments for the tree.  I made an ornament lsat month using Crafter's Companion Christmas Tree stamp set and, believe it or not, empty toilet paper rolls.

This time I had an extra colored image left over from a wreath I had made using the Cute Companions stamp set called Christmas Magic.  So I made an ornament for my tree.  I decided to try my hand at one of those handmade flowers, the ones you make out of patterned paper and a gazillion folds!  Well, my Ultimate Crafter's Companion Tool made short work of scoring my paper (3"x6") at half inch intervals.  I did this to two pieces of leftover Christmas paper.  Then I adhered the fans into two semi-circles, and then adhered them  together, holding them in place with binder clips until the glue dried.

Next I inked the edges of my "fan flower" and adhered it to a paper doily.  Then I had to add some shine, so I Stickled the edges of both my flower and the doily.  Last two steps were to pop on the image, which had already been Copic-colored, Stickled and framed, and to attached some gold cord from which to hang my ornament.  (I also added a white ribbon with pearl embellishments to hide where the cord was tied to the ornament)

And now you see it proudly displayed on myChristmas tree!  I can't wait for hubby and the kids to "discover" the new ornament!  BTW, have you been over to the Crafter's Companion Challenge Blog?  This month their challenge is to "make it shine", whether it be cards, layouts or altered art.  Just use a CC image and give it some glow and play for a chance to win an awesome prize!

Sunday, December 18, 2011

Never Cut Corners!

At least when it comes to this week's Hambo Hoedown Challenge!  They want us to glam up our corners on our cards, with punches, dies, bling, whatever tickles your fancy!
Please excuse the quality of my photo.  After filming my franddaughter at a Christmas Show they did for an Assisted Living Home, I went to take a pic of my card and found the battery dead.  So I had to use my camera!
Anyway, I made my corners special by using a fantastic corner punch i inherited when i lost contact with an old cropping buddy.  It makes the coolest flash lightning corners!
I colored my newest digi-image from Hambo Stamps, "Santa Monster".  It comes with two sentiments.  I used one on the inside of my card that reads "Season's Greetings, Earthling".  I added a colored and shaped paper clip, and a border of bling, as well as a metal brad to finish off my card.
Hambo Challenge Blog offers a free digi to any challenge player, and they have the cutest images.  Go play in their games!

Day 18 of Crafting Christmas - More Cards

Although this month leaves me no time to scrap my photos, I can always catch a few moments to create a cards, and lord knows I have enough friends and family to whom I can send them!  So I printed up one of my newest additions to my growing collection of Squigglefly digi images.  This one is called "Unconventional Christmas Tree" by Mark Hicks.  The elves and Santa are a really great group that shows what teamwork is all about!  And the elves must work out; how else can they build a pyramid with Santa on top?!

Anyway, I printed up two images, and colored each differently.  Then I made cards out of each, and will put them on my Christmas presents to my sisters this year, as I drew their names for this year's gift exchange.

The first card is an easel card, and I used Copics to put a lot of fun colors for my elf tree, with Santa shining bright as a star on the top. 
The double-sided patterned paper is from the falalalala collection from Echo Park, and really says it all.  I tossed on a few tiny heart jewels for the elves to hold for a little shimmer.  The elves show no strain at hoding up the big guy, do they?  That's job satisfaction!


I used the nontraditional colors of bright green and purple papers on my second card, while coloring Santa and the elves in Christmasy greens and red. 
Every single item used to make this card was from my leftover stash of paper pieces, jewels, sentiments, etc. 
A few jewels are added for simple embellishments, as well as the sticker sentiment.


I had so much fun with these cards, that I printed up more digis from Squigglefly and made a couple more cards.

Here is an image from a set of digis called Polar Pack by . It's a new release that you can get later this month at Squigglelfy. I decided to print multiples of the one image, although you get like eight different ones.  I enjoyed coloring each Santa cap a different color with my Copics. 
I bought the felt holly border at Michaels on clearance last year, and added some adhesive-backed parls to glitz it up.

One more image to show you, another new release called "A Christmas Classic".  As soon as I saw this, I thought of an oldtime piano player by the name of Liberace, but I didn't have enough gold to glitz my card like he used to glitz his piano! 

Somehow I think that this classic piano piece is more to the tune of Rudolph the Red-Nosed Reindeer rather than anything Handel composed, wouldn't you agree? 

Anyway, some ink by Copic, glitz by Stickles and a couple bows bows finish off the last of my Christmas cards.  Are you finished with your cards yet?  If not, I hope mine inspire you to get in your crafting mode and create something marvelous and merry!!

Saturday, December 17, 2011

Day 17 - A Card for my Son

In the midst of all the Christmas shopping and planning and activities, etc., it's very easy to overlook my son's birthday.  Especially this year, as I seem to be working more hours, falling behind by the minute, concentrating on his daughter's Christmas celebration with us, and not least, my son's Army reserves Drill this weekend.
So I find myself a card short, and had to clear off a spot on my craft table to make him a card.  I used a Squigglefly digi image that has a heavy Christmas theme to it, but it doesn't necessarily have to be for Christmas.  The image is called Bauble Box by Diane Carubia
I colored it with my trusty Copics, cut out the image with my Creative memories circle sutting system, framed it with a metallic colored cardstock, and adhered it to some patterned paper from Echo Park.  The paper is double-sided, so I used the other side and cut out a bar of musical notes for an easy embellished border. 
I stamped my sentiment in black ink along the musical notes.  Finally, I added some shimmer with Stickles on the snowflakes, and a little CTMH Liquid Glass on the image.
I know my son will like his card, but I know he will LOVE his birthday present.  He really wants a Blue Ray player, so I found a good deal and got him one.  As far as the movies he wants, well, there's always Christmas a week from now!!

Friday, December 16, 2011

Christmas is Coming

Day 16 of my 24 Days of Crafting Christmas, so I wanted to show you another card I made for friends and family this year.  I used Queen Kat Design's rubber stamp called "Robin in Ivy" by Joanna Bromley.  This little bird looks ready for the holidays--sure wish I were!  I have 25 people coming to my house for dinner (27 if the queen and her gram come), but the walls of my house stretch for family and friends.  I need to finish off a few more projects before I can breathe, but I can see the light at the end of the tunnel!  It helps that I love what I do, so it doesn't feel like work.  I just need some time in an alternate universe, so I can craft to my heart's content, finish my projects, catch a few zzz's, and return refreshed and at the very moment that I left (alternate time works that way---cool, huh?!).
Back to reality (as I know it):  I love this little robin so much, he is on quite a few of my cards this year.  I framed him with diecut ever-greenery, forming a wreath around him.  The diecut trees below are topped off with a little snow, and flakes are falling from the sky all around him.  Don't you love that Christmas song sheet patterned paper from My Mind's Eye?  I wish I had a few more stacks!!
Keep on crafting, all.  If you're in need of any last minute gifts for your crafty friends, you can find some beautiful stamps over at QKD.  Remember, there are only 8 more crafting days until Christmas, so lock yourself in your craft room and crank up the Chipmunks Christmas album (it's sure to keep the rest of the family out so you can work).

Wednesday, December 14, 2011

Day 14 of Crafting Christmas - Set a Pretty Table

It's about time to finish up those last minute gifts and start working on the house and table decorations.  And guess what?!  I found more uses for those pesky yet useful toilet paper rolls!

The first project is favors for each guest, and so I made Holiday Crackers.  I just found a tutorial for these great holiday crackers here: http://whiffofjoy.blogspot.com/2011/12/advent-calendar-day-12.html 
In addition to making table favors, you can make coordinating napkin rings as well! 

The crackers require two rolls. Cut one in half and lay the pieces along the edge of wrapping paper, leaving about an inch between the longer roll and the two shorter rolls ( short  long  short).  Using double-sided tape, roll the paper rolls in wrapping paper, seal with more tape, then twist and tie the shorter ends (I used twine).  Whoops, don't forget to stuff your little treats inside before sealing (like I did the first one)!Tuck in the edges of the wrapping paper and decorate as you please.  I used a colored and Stickled image from Melissa (thank you!).

For the napkin ring, I cut a toilet paper roll in half and rolled it in the same Christmas wrapping paper and embellished it with a diecut snowflake and a jewel. Done and done!

These place settings will make a lovely presentation on Chrtistmas Day when my family comes over, don't you think?

Tuesday, December 13, 2011

Crafting Christmas Day 13 - Putting on the Glitz

I have been dying to break out my Crafter's Companion stamps and make something SHINY!  That's what the CC Challenge Blog is asking for this month: a card or project that uses a Crafter's Companion Stamp and Make it Sparkle.
I had an idea to make a Christmas wreath using some CDs from my stash, but circles and I have never been too friendly.  Then I saw someone use plastic lids of assorted sizes and made a wreath out of them.  Well, darn if I couldn't find my inspiration again, so I just tried to piece a wreath together myself.  I stamped, colored and cut out the four images from the Cute Companions Christmas Magic stamp set by Jayne Nestorenko and the CC inspirational team.  I like the way they are designed, as you can use them to create ornaments, or to put together with another stamp from the set to make snow globes.
So once I used my Creative Memories circle cutter on the images, I was able to cut out three more sizes of circles for my wreath.
I cut out a chipboard circle base on which to adhere my circles.  I started with the largest, all made from CTMH patterned papers (thanks, Melissa) and placed them on the base, using some dimensional tape on some but not all the circles.  Once I had them all down, I started adding snowflakes and stars and bling. 
Did I mention that my images ooze shimmery Stickles?!  Here's a close-up of one of them.
Yes, you're right, I even Stickled some of the lines on the patterned paper circle!

Of course, having put a shine on the images, I couldn't leave my white snowflakes to be ignored, now, could I?
 
No, I thought you'd agree with me!  So for the several snowflakes I added to my wreath (thank you, Linda) I added Diamond Stickles, jewels, and Skittles.  

Here's a close-up of one of the many snowflakes I added to the wreath, highlighting the extra glitz I put on the whole project.  I hope you like my recycled, upcycled paper wreath.  i also hope you have time to join in the December challenge at the Crafter's Companion Challenge Blog.  Their prize is da' bomb!!  And as always, keep on crafting!

Monday, December 12, 2011

Day 12 - Clean and Simple

Squigglefly is posting one of the most difficult challenges for me personally:  Create a CLEAN and SIMPLE card that reflects the upcoming holiday season, whether it be Christmas, Hanukkah, Kwanzaa, or New Year's. Let's see what CAS means to you!

Squigglefly's Holy night digi image
 Now, when I scrapbook I cannot get into the "white space" technique, so this CAS technique is driving me wild.  I want to add bling, to paper piece my image, to add a few more layers onto my card!  My style is anything but CAS!  However, I promised myself that I would never step away from a challenge, and that I would attempt more techniques and projects that I've never done before--at least once.  I mean, it took me months before I would try to make an easel card, and now they are practically my favorite card to make!  So saying, here's my idea of what Clean and Simple looks like in Patacake's craft room.
After printing Holy Night digi image from Squigglefly, I decided there was so much detail that I would give it a little color by using my Glimmer Mists from Tattered Angel.  I used all three of the colors I had on hand: Patina, Key Lime Pie and Pink Bubblegum.  I then framed the image onto black cardstock.
The cardstock that I used for the card base needed some toning down, but how to do this in a minimalistic way?  I had an errant paper doily on my desk (how she got out of the drawer I don't know) so I used it to back my framed image.  Still too much green, but I did like the color, so instead of starting over again with a different card base, I used some white pigment ink on the edges to distress/lighten it up just enough to satisfy my artistic eye.
Finally, I had to add one tiny jewel above the image.  Now, some may say that having more than one layer, or adding the bling at the end, defeats the CAS standard, but for me, this card is so clean and simple that I want to ADD MORE to it, so I will put it in an envie and send it to a friend right this minute (well, when I'm finished typing) to keep my hands off of the "finished" project.

Saturday, December 10, 2011

Crafting Christmas -- Day Ten

We're into the home stretch, and I have yet to make a single purchase.  Yikes!  However, I have made some glorious projects that will be presents for good little girls and boys in my family.   We're having Christmas morning at my youngest sister's house.  We nibble on cookies and drink champagne as we open our stockings from Santa.  Then we move onto breakfast and presents from each other. 
I have to uphold the Christmas morning tradition by making and bringing a Cheese Wreath (recipe below). Picture a family-sized donut made of biscuit dough, baked like monkey bread so that there are pieces of biscuits to tear off when finished cooking.  This special donut's frosting is a good portion of creamy melted cheese, topped with sprink;les of bacon (a whole pound, to be exact).  Not exactly cholesterol free (or fat free or carb free or free anything!) but yummy good!
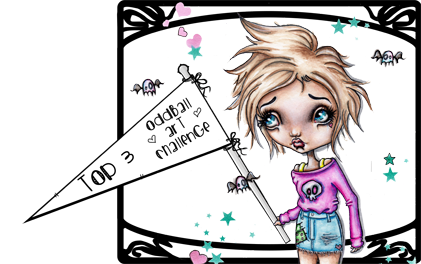
closed card
 Back to the card!  I made it for my youngest sister using "Anta Claus" digi image by Hambo Stamps.  When I saw this image, I knew I had to print multiples of it in various sizes, and their Challenge Blog's theme this week of making a card with more than the standard fold  fit right into my plan.
I made a Z-fold card with a slanted top, although for my card I filled in the back of the card.  I printed and mirror image printed my digi in three sizes.  I stayed with a violet and icy light teal  color scheme for the wintry look, using Copics BV00, BG10, YG09, R29, C3 and 100 (black), The bright green, red and black were for the ants' bodies, boots, mittens and hats. 
The ants are Santa's secret weapons, you know.  How else can he get ALL those presents into his sack in time to deliver them?  We all know ants are the busiest, most organized creatures on the planet (except for my boss).  So when you hear the word elves, think ants!
As I created this card, that darn @#!*# song about the ants go marching kept marching through my head, so I incorporated it into the sentiment.  As you open this Z-fold card, the entire sentiment reads:
"The ants go marching two by two, the little one shouts, 'Merry Christmas to you!' and they all go marching..."  HA!  Now you try to get it out of your head!  I tell you, it's a killer!

Open card
 To finish my story, I couldn't find a lone Santa Sack image or stamp to save my life (or finish my card).  So I had to freehand it (gasp).  So please look with kindness in your heart (or don't look) because I am NOT a sketch artist!  But it finished the card, and Santa will once again have a full sack this Christmas Eve.
So worry not, children, the "elves" are on the job.
Now it's your turn to get to work at the Hoedown and make your challenge card for this week!  See you with your dancin' shoes on!

Friday, December 9, 2011

Getting Ready for Christmas with Queen Kat Designs

Okay, crafters, I hope you're more on schedule than I am! I have my cards finished and ready to mail out, but I still have quite a few projects to finish before the big day (did I say that there were only 15 more crafting days until Christmas???).  This is the 9th day of my 24 Days of Crafting Christmas, so here's one of the cards I'm handing out this week.  It uses the QKD new stamp release by Joanna Bromley called Christmas Elf.  Now that's a guy who takes his work seriously, yet looks like he's having fun with it!

I colored him with Copics and added some sparkle (what's Christmas without some sparkle?) with a little Stickles applied here and there.  Some felt fusion to form a border for my card, a cardstock sentiment, and a few pieces of patterned paper finish off my festive card, along with a couple of well-placed jewels. 

I wonder how many ornaments this little fellow has to polish before his next coffee break?
Check out the wonderful holiday stamps available at The Shoppe, and remember to keep on crafting!

Thursday, December 8, 2011

Winter Acrylic Album Sparkles on the 8th Day of Crafting Christmas

I'm creating an album for a swap I'm in and had to show off the cover.  It's just a sneak peek of things to come, but I think it's so pretty I just had to share.  It took me forever to come up with the cover, as it was a piece of stiff brown felt that came in an album kit.  Whoever heard of a brown Christmas (wait, I live in Chicago, where it's been green white, sooty grey and brown!)?  So I had to cover that awful color, but what to use? 
I chanced on a bottle of acrylic paint so my brown cover became white.  It got even whiter with a dash of Diamond glitter from Stampin Up.  Hmm, not wintry enough, so I added a few pieces of Christmas papers with a small doily behind it--ahh, that's better!  A few snowflakes added to the wintry effect. 
The title was inspired by the person who will receive it.  And a ribbon finished it off.
Now for my quandary---what do you do with acrylic pages??!  I've looked for inspiration, but nothing matches my needs.  I am really clueless as to the rest of the album, and I don't have a lot of time to finish it before it needs to be mailed.  So if you have any suggestions, PLEASE leave me a comment.
And as always, keep crafting!

Wednesday, December 7, 2011

Like Grandmother, Like Granddaughter

My granddaughter loves to craft!  There's not a single day when she's over that she doesn't want to "make just one card, Grandma", or color images with Grandma's markers "cause they're better" (Copics).  So a few weeks ago I gave her some images to color, and she did  a great job, staying in the lines, paying attention to detail.  Did I mention she was four years old?

Bella's cards

Anyway, she has a pile of little goodies to give out this Christmas morning, so I cut her colored images out, framed them, and let her make her own cards to put on her packages.  She adhered them onto the card fronts, added a sticker here and a bow there, wrote the person's name on each, and signed her name inside.  I only helped her wrap the gifts and attach the cards to each.

I think she did an awesome job, but then again, I am prejudiced, after all.  What do you think?  Wouldn't you love to get a card from my little crafter?

My only problem is that I really don't want her using my Copics.  Hubby says I sound like Gollum (precious...) from the Lord of the Rings trilogy when I tell her NO.  But I did get Bella her own set of markers to color with, and she's realizing that artists are very protective of their supplies.  Of course she can have all the paper and stickers and alphas she wants.  I have enough of that stuff to last two lifetimes!

Anyway, my whole point is that you're never too young (or too old) to start creating.  And I guess to never let your Copics out of your sight or some little girl is going to use them) 
So happy crafting to all, and to all a good night!

Tuesday, December 6, 2011

Be Naughty and Save Santa the Trip

I got a great digi sentiment from Squigglefly that says, "Be Naughty, Save Santa the Trip".   Now I had two really fantastic Squigglefly digi images that could go with that sentiment, but I couldn't decide which one to use.
So I used them BOTH!!!  I made two Christmas cards to give to some special  girlfriends who have been extra good this year, so they have some "room for mischief". 

The first uses one of my fave images, called "Badonkadonk" by Chesney Young.   I paper pieced her dress for a little flair, and colored the rest of the image with Copics.  I applied some Stickles to highlight her hair, and Liquid Glass on her lips for some holiday shine.  I used leftover patterned paper for the background, and added an ornament with a bow for embellishment. 

This card is a 6x6, which is one of my favorite sizes of cards to make, but as the envie costs not one but TWO postage stamps to mail, I'll be handing this one to my girlfriend personally!

Next up is a card I made using the Squigglefly digi image called "Offcicial Mistletoe Tester" again by Chesney Young.  I originally wanted to make an easel card, but I printed the image too large for my card, and as I wasn't at home to resize and print again, I made do with a standard fold card.
I used the "lip-smacking good" patterned paper that came in a whole stack that I snagged from a rummage sale this summer.
She looks like she's enjoying her job, doesn't she?  I fussy-cut her out to fit the card front, but you don't have to.  I wanted to give it some texture with some red fun flock, but upon inspection, my stash didn't have any!!  Must put that down on my Christmas List!!

Both cards offer the second part of the sentiment on the insides.  This one will be mailed out today, so it can get to its destination before Christmas! 

Hope you like my naughty cards.  I know my bff's will!  So get busy, crafters!  Only 18 more crafting days before Christmas!!

Monday, December 5, 2011

Puff the Magic Dragon


Closed easel card

Happy Monday, crafters!  I hope you all are crafting your way toward the holidays.  I have my cards in the mail, a few gifts finished and many more to wrap!  This is DAY 5 of my 24 Days of Crafting Christmas and I wanted to take time to relax in my craft room with a challenge card I'm submitting to Squigglefly Challenge Blog.  Their challenge this week is to create a card/project based on a song.  Normally, dragons and Christmas don't go well together (fire hazard, you know) but when the said dragon is enjoying a few presents crafted especially for her, AND she's safely outside, then I think they go happily together!  Besides, I grew up with the song Puff the Magic Dragon, and still love it!

Open easel card
 I made an easel card using Christmas Dragon digi-image by Rachel Goble.  I think a lot of Squigglefly images go very well on easel cards and they are SO easy to make.  Just choose the size of your card, fold it like normal, then fold it again but just the top (front) piece, so it forms a tent on top of the back (bottom) piece.  Now you can adjust your Squigglefly digi image to the size that fits perfectly on your card face.  I highlighted my dragon image by fussy-cutting her out and adhering her to just the edge of the bottom half of my card face, so when I open the card and "stand it up", the dragon looks as if she's sitting on top of the fence overlooking the town.  I love the way you can get two different looks from one card, either by keeping it closed or propping it open.

She certainly looks festive, doesn't she?  I added different colors of Stickles to her Christmas lights for added sparkle.  The patterned papers are from the Me & My Big Idea Christmas paper stack from a  few years ago.  This card, as well as any others I make from here on out are for personally handing to recipients, not mailing, since it's so late (postal timing, not mine).

Keep crafting and take a look at the Squigglefly Blog for inspiration this holiday season, as well as a chance to win!  And don't forget that it's not too late to give the gift of digis to your special crafter.  No mailing times will get in your way of super fast delivery to your email address, and the prices are perfect for any budget!

Sunday, December 4, 2011

Snowball Fight Inspires Day 4 of Crafting Christmas

Winter came down to our home one night
Quietly pirouetting in on silvery-toed slippers of snow,
And we, we were children once again.
~Bill Morgan, Jr.

What a great sentiment to put on this card, don't you think?  I made this card using Hambo Stamps Snowball Fight digi-image.  The challenge this week at the Hoedown is to make a card using dry embossing.  This is also my fourth craft project during my 24 Days of Crafting Christmas.
I took two different colors of  cardstock with the same dry embossed texture and made a winter scene.  The background piece has a white core, so I was able to sand the design so that the swirls look like switrling gusts of wintry wind.  The other piece matched the shading of my snow, and gave even the "playing field" some dimension. 
I printed the sentiment noted above on the inside of my card, and I can send it out in my January mailing, to all the friends that i need to catch up with after the holidays!  I love how the kids (I do believe they are brother and sister, they just have that look, you know?) are eyeing each other, waiting for someone to throw the first snowball.
Now it's your turn to dance in the Hoedown!  you can grab a FREEBIE image to use, or iuse what you have.  Have fun and keep crafting!

Saturday, December 3, 2011

The 24 Days of Crafting Christmas - Day Three

...on the Third day of Christmas, my crafter gave to me, three notecard sets...
Well, my words aren't the same as the standard Christmas song, but I DID manage to make another set of handmade Christmas gifts.  This time I was crafting for my co-workers, and I thought they could all use a set of monogrammed notecards.  It's really easy to make, as all you need are: cardstock for the card bases, patterned papers for the card face (I matched the papers to the prsonalities), alpha letters (I used Baroque Alphabet stamp set by CTMH) and some ink (I used Copics).  The cards are clean and simple (CAS), and look great.  However, I realized that the packaging was just as important as the gifts, so I had to come up with some creative containers.  I made an extra monogram for each set, so I could then place each on the package, which leads to minimal embellishing (phew!)
I made a set of ten cards for each person, and a Christmas card to go with each checks them off of my crafting to-do list for the season!  Besides a few more paper crafts, I have some machine sewing to do, and I haven't brought out the Singer for almost a year, so cross your fingers that my next project will go smoothly!!

Friday, December 2, 2011

Twenty-three More Crafting Days Until Christmas

Have you got your cards finished and out the door?  Are your presents made and wrapped and under the tree yet?  If you're like me, the answer will be, "What?! Are you nuts?!"
This is the second day of my 24 Days of Crafting Christmas, and I just wanted to show you a present I made for my bff.  She is the Queen of List Making, and I thought I'd gift her with more than just a card this year.  I altered a notebook so she can jot down all her New Year's Resolutions in it now, and laugh over the lists next New Year's Eve!
I used Queen Kat Design's Christmas Elf by Joanna Bromley, who looks so happy at what she's doing that she inspired me to use the sentiment "Love What You Do; Do What You Love".  It's a shortened version of "Love what you do and you'll never work a day in your life", but I didn't have enough room for that! LOL
I couldn't stop coloring my image, and then I couldn't choose which one to use on the cover, so I decided to go with them all!  Some Stickles added shine to the ornaments and the starry backgrounds, and some skittles glitzed up the patterned paper I used to cover the notebook.  I adhered a wide ribbon down the spine and cut the end in four, then braided it and attached some beads.
I already made her card, so I'm finished with one person, except for wrapping it!  Only umpteen more to craft!  I'm going to be busy this month, but I'm sure I'm not alone!
Hmmm, do you think Santa could use another crafter??? Free hot cocoa, lots of Christmas songs, a long layoff, and all the crafting time in the world!  I'm in!!!  LOL

Thursday, December 1, 2011

Twenty-four Days of Crafting Christmas

Here we go, we're into the short stretch.  Only 24 more crafting days before Christmas, and I'm going to start with showing how I altered a couple of Black Friday deals into gifts for my friends.
I got to Menard's in time to snag a few Jar Candles--they had Vanilla, Cinnamon Vanilla Spice and Pumpkin Spice.  The jars were nice and large, and the scents not too bad (remember, a gal with allergies thinks a lot of things stink).
So I covered the jars with patterned paper, adhered a nice diecut sticker or colored image, nicely framed, then added ribbon, lace and flowers to give a Christmas look.  A piece of coordinating patterned paper cut to fit the circular cover and a holiday sentiment, and I have two handmade gifts ready with cards for my Santa act!